Arriving at your campsite for the first time can feel exciting—and a little overwhelming. Whether you’re traveling across the country or planning a stay near St. Louis, knowing exactly what to do when you arrive makes your first night smoother and far more relaxing.
The good news is that campsite setup follows a simple routine. Once you learn the process, it becomes second nature.
This step-by-step RV setup checklist will walk you through everything you should do when setting up your RV at a campground for the first night.
Why Following an RV Setup Checklist Makes Travel Easier
Creating a consistent arrival routine helps you:
- Avoid missing important setup steps
- Protect your RV equipment
- Connect utilities correctly
- Stay safe during travel stops
- Relax faster after arriving
Even experienced RV travelers follow a checklist each time they arrive at a campsite.
Step 1: Choose the Best Position on Your Site
Before parking your RV, take a moment to evaluate your campsite.
Look for:
- Utility connection placement
- Tree clearance above your RV
- Space for slide-outs
- Level ground conditions
Pull forward slowly and confirm you have enough space to extend your slide-outs safely.
If your site is near St. Louis, positioning correctly also helps you take advantage of shade during warmer months.
Step 2: Level Your RV
Leveling your RV is one of the most important setup steps.
A level RV helps:
- Appliances operate correctly
- Doors open and close properly
- Slide-outs extend smoothly
- Water drains correctly
How to Level Your RV
Depending on your setup, leveling may involve:
- Automatic leveling systems
- Manual leveling jacks
- Leveling blocks
Check your level from front to back and side to side before continuing.
Step 3: Set the Parking Brake and Stabilize the RV
Once your RV is level:
- Set the parking brake
- Lower stabilizer jacks
- Confirm the RV is secure
Stabilizers reduce movement when walking inside the RV and improve comfort throughout your stay.
Step 4: Connect Electrical Hookups
After stabilizing your RV, connect shore power.
Most RV parks near St. Louis provide:
- 30 amp service
- 50 amp service
- Full hookup utility pedestals
Safe Electrical Connection Steps
Follow this order:
- Turn the pedestal breaker off
- Plug in your surge protector
- Connect your RV power cord
- Turn the breaker back on
This helps protect your RV’s electrical system from voltage issues.
Step 5: Connect Fresh Water
Next, connect your freshwater hose.
Fresh Water Setup Steps
Attach your hose to:
- The campground water spigot
- A water pressure regulator
- Your RV freshwater inlet
Using a pressure regulator helps protect your plumbing system from unexpected pressure spikes.
Once connected, slowly turn the water on and check for leaks.
Step 6: Connect Sewer Hookups (If Available)
If your campsite includes sewer connections, you can connect your sewer hose after leveling and water setup.
Sewer Setup Basics
Connect your sewer hose to:
- Your RV outlet
- The campground sewer inlet
Keep your black tank valve closed until dumping is necessary.
This prevents waste buildup problems.
Full hookup parks make this process especially convenient during longer stays near St. Louis.
Step 7: Extend Slide-Outs
Once utilities are connected and your RV is level, extend your slide-outs.
Before extending:
- Confirm clearance on both sides
- Check overhead obstacles
- Verify stabilizers are down
Slide-outs significantly increase your living space and comfort.
Step 8: Turn On Appliances
After completing hookups, activate essential appliances.
Check that:
- Refrigerator is cooling
- Air conditioner or furnace is working
- Interior lights function properly
- Water heater is operating
Testing appliances early prevents surprises later in the evening.
Step 9: Check Interior Systems
Before settling in, do a quick interior check.
Look for:
- Proper airflow from vents
- Working outlets
- Stable water pressure
- Functional bathroom fixtures
These quick checks help confirm everything is ready for the night.
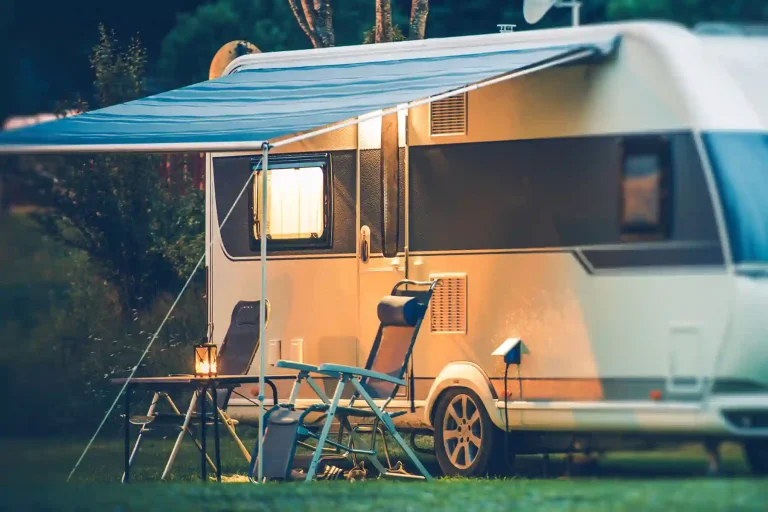
Step 10: Set Up Your Outdoor Living Area
One of the best parts of RV camping is enjoying time outside your RV.
Many travelers set up:
- Outdoor chairs
- Folding tables
- Rugs or mats
- Portable grills
Creating a small outdoor space makes your campsite feel more like home.
Step 11: Secure Your Tow Vehicle or Gear
If you are towing a vehicle or trailer:
- Disconnect safely if needed
- Park in designated areas
- Secure loose equipment
Keeping your site organized improves both safety and comfort.
Step 12: Walk Around Your RV One More Time
Before relaxing for the evening, do one final walk-around inspection.
Check:
- Power connection stability
- Water hose placement
- Sewer hose positioning
- Slide-out clearance
- Stabilizer jack contact
This final check helps prevent small issues from becoming larger problems overnight.
Common First-Night Setup Mistakes to Avoid
Even experienced travelers occasionally skip steps.
Avoid these common mistakes:
- Forgetting to level before extending slide-outs
- Connecting electricity without surge protection
- Leaving the black tank valve open
- Skipping a final walk-around inspection
Following a checklist helps prevent these issues.
How Setup Gets Easier After Your First Trip
The first campsite setup usually takes the longest.
After a few trips, most RV travelers develop a routine that allows them to complete setup quickly and confidently.
Many experienced travelers can complete their entire setup in 20 minutes or less.
Consistency is the key.
Make Your First Night Easy at St. Louis Mulberry RV Gardens
If you’re planning your first campground stay near St. Louis, choosing the right RV park makes setup much easier.
St. Louis Mulberry RV Gardens offers spacious sites with dependable 30 and 50 amp full hookups designed to support both first-time visitors and experienced travelers. With convenient utility access and a peaceful environment just minutes from downtown St. Louis, it’s an ideal place to begin your RV camping experience.
Arrive with confidence, follow your setup checklist, and relax knowing everything you need for a comfortable stay is already in place.
Reserve your site at St. Louis Mulberry RV Gardens today and enjoy a smooth first night at the campground.